
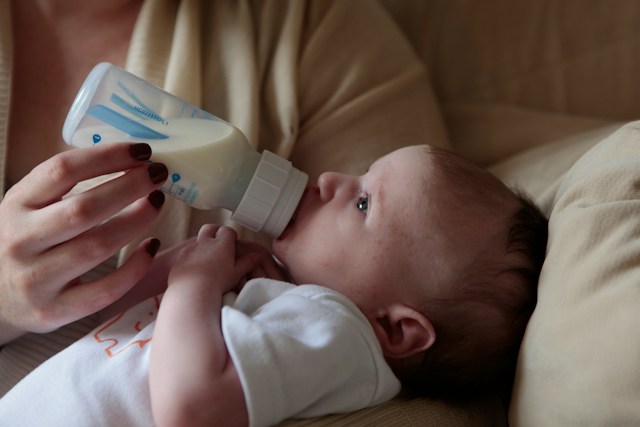

Quick answer: Parents can fit bottle sterilising into a busy feeding routine by batch-sterilising multiple bottles at once, choosing a fast method like steam or cold-water sterilising, and building sterilising into existing routines (such as during naptime or overnight). Preparing several bottles in one session, rather than one at a time, saves the most time and stress.
Feeding a newborn can feel like a full-time job layered on top of everything else life demands. Between night wakings, nappy changes, and trying to grab a shower, finding time to properly sterilise bottles often slips down the priority list. Yet sterilising remains one of the most important steps in keeping a baby safe from harmful bacteria, especially in the first 12 months.
The good news is that sterilising doesn’t have to be another source of stress. With the right approach, it can become a quick, almost automatic part of your feeding routine rather than a dreaded chore squeezed in between everything else. This post breaks down practical, realistic strategies for parents who are short on time but still want to keep bottle feeding safe and simple.
Why Does Bottle Sterilising Matter So Much in the First Year?
Babies have immune systems that are still developing, which makes them more vulnerable to infections from bacteria like E. coli and salmonella. These bacteria can grow in milk residue left on bottles, teats, and other feeding equipment if they aren’t cleaned and sterilised properly.
Health guidelines generally recommend sterilising feeding equipment until a baby turns 12 months old. After that point, a baby’s immune system is typically better equipped to handle everyday germs, though washing equipment thoroughly in hot, soapy water remains essential.
Skipping sterilisation isn’t just a minor oversight. It can lead to digestive issues, vomiting, or more serious infections, particularly in the newborn stage when babies are most at risk. This is why building a reliable, repeatable sterilising habit matters so much, even when life feels chaotic.
What Are the Fastest Bottle Sterilising Methods for Busy Parents?
Not all sterilising methods take the same amount of time or effort. Choosing the right one for your household can make the biggest difference in how manageable the process feels day to day.
Steam Sterilising: Quick and Hands-Off
Electric steam sterilisers are popular among parents juggling multiple responsibilities because they require minimal hands-on effort. Simply load the bottles, add water, and switch it on. Most electric steamers complete a cycle in around 6 to 10 minutes, and some models keep equipment sterile for up to 24 hours if the lid stays closed.
Microwave steam sterilising bags or containers offer a similar benefit without needing a dedicated appliance. These typically take 90 seconds to a few minutes, making them a solid choice for smaller kitchens or for parents who travel frequently.
Choose steam sterilising if you want speed and minimal manual effort, and you already have access to a microwave or a dedicated electric unit.
Cold-Water Sterilising: Convenient for Overnight Use
Cold-water sterilising uses a sterilising solution (often a chlorine-based tablet or liquid dissolved in water) in which bottles are fully submerged for at least 30 minutes. One major advantage is that items stay sterile for up to 24 hours as long as they remain submerged and the solution is changed every 24 hours.
This method works particularly well overnight. Submerge your bottles before bed, and they’re ready to go in the morning without any extra effort required at an already hectic time of day.
Choose cold-water sterilising if you prefer a low-tech, inexpensive option that doesn’t rely on electricity or a microwave, and you don’t mind preparing a solution.
Boiling: Reliable but More Time-Intensive
Boiling bottles in a pot of water for at least 10 minutes is the most traditional method and doesn’t require any special equipment. However, it takes longer, requires close supervision to avoid overheating or warping certain plastics, and ties up a stovetop and pot that might be needed for other things.
Choose boiling if you don’t have access to a steriliser or sterilising solution and need a simple backup method using items you already have at home.
How Can Parents Build Sterilising Into an Already Busy Routine?
Knowing which method to use is only half the equation. The other half is figuring out how to slot sterilising into a day that’s already stretched thin. Here are some practical strategies that make a real difference.
Batch Sterilise Instead of One Bottle at a Time
Rather than sterilising a single bottle right before each feed, prepare several bottles in one session. Most electric steam sterilisers and cold-water solutions can handle multiple bottles, teats, and pump parts simultaneously. Batch sterilising once or twice a day, instead of five or six times, cuts down significantly on repeated effort and mental load.
Pair Sterilising With an Existing Routine
Habits stick best when they’re attached to something you’re already doing. Try sterilising bottles:
- Right after the last feed before bed, so everything is ready by morning
- During a baby’s first nap of the day, when hands are briefly free
- While prepping dinner, if your steriliser or boiling pot can run unattended
Linking sterilising to an existing anchor point in the day removes the need to consciously remember it as a separate task.
Keep a Dedicated Sterilising Station
Designate one spot in the kitchen for all sterilising supplies: bottles, teats, pump parts, tongs, and solution or steamer. Having everything in one place reduces the time spent searching for items mid-task, which matters when you’re operating on broken sleep and limited patience.
Involve a Partner or Support Person
If there’s another caregiver in the household, splitting sterilising duties can lighten the load considerably. One parent might handle the evening batch while the other manages morning feeds. Even grandparents or helpers who are around during the day can take on this task once shown the process.
Travel-Friendly Sterilising for Life Outside the House
For parents who are out and about frequently, portable sterilising bags or UV sterilising devices can be useful. These allow for sterilising on the go, such as while visiting family or staying overnight somewhere without steriliser access.
Should You Sterilise Every Single Feeding Item?
Not every item requires the same level of sterilising attention, which can help parents prioritise their time. Bottles, teats, and breast pump parts that come into direct contact with milk should always be sterilised until a baby’s first birthday. Items like bottle warmers, formula dispensers, or storage containers used for pre-measured powder typically only need regular washing with hot, soapy water, since they don’t carry the same contamination risk.
Choose to focus sterilising efforts with momcozy sterilizer on anything that touches milk or formula directly, and simplify your routine by washing everything else thoroughly instead.
What Common Mistakes Should Parents Avoid When Sterilising Bottles?
A few missteps can undo the benefits of sterilising, even when parents are trying their best:
- Touching sterilised items with unwashed hands. Always wash hands before handling sterilised bottles and teats.
- Leaving bottles in cold-water solution past 24 hours. The solution loses effectiveness and needs to be refreshed daily.
- Overcrowding a steamer. Packing too many items in at once can prevent steam from reaching every surface evenly.
- Forgetting to sterilise pump parts. Breast pump components that touch milk need the same attention as bottles and teats.
- Assuming washing alone is enough. Washing removes visible residue, but sterilising is still necessary to eliminate harmful bacteria.
Making Sterilising One Less Thing to Worry About
Bottle sterilising doesn’t need to be a daily source of stress for new parents. By choosing a method that fits your lifestyle, batching your sterilising sessions, and attaching the task to routines you already follow, it becomes far easier to manage alongside everything else that comes with caring for a newborn.
As your baby grows and moves past their first birthday, sterilising requirements ease up, and the extra step will no longer be part of your daily routine. Until then, a little bit of planning now can save a lot of time and worry later, giving you one less thing to think about during an already demanding season of parenting.
Frequently Asked Questions
How long do bottles need to be sterilised for?
Steam sterilising typically takes 6 to 10 minutes in an electric steriliser or around 90 seconds in a microwave bag, while cold-water sterilising requires at least 30 minutes of full submersion. Boiling bottles takes a minimum of 10 minutes.
Do I need to sterilise bottles after every single use?
Bottles should be sterilised before each use until a baby turns 12 months old. Many parents achieve this by batch sterilising several bottles at once rather than sterilising individually after every feed.
What’s the cheapest way to sterilise bottles without buying equipment?
Boiling bottles in a pot of water on the stove requires no special equipment and is one of the most budget-friendly methods, though it takes more hands-on time than steam or cold-water sterilising.
Is it safe to stop sterilising bottles before 12 months?
Health guidelines generally recommend continuing to sterilise until a baby’s first birthday, since their immune system is still developing. After 12 months, washing equipment thoroughly in hot, soapy water is usually sufficient.
Can I sterilise bottles while traveling?
Yes. Portable microwave steam bags and UV sterilising devices are designed for travel and allow parents to sterilise bottles without access to a dedicated electric steriliser.
